How to ship your products to Amazon FBA: A step-by-step guide
If FBA shipping has ever made you second-guess your box sizes or sweat over labels, this step-by-step guide clears the fog.

Getting your products to Amazon’s fulfillment centers can seem complicated. Many sellers find themselves clicking through endless Seller Central screens, second-guessing every box dimension, and wondering if they’ve missed some crucial step that’ll send their shipment into the dreaded “problems” pile.
The truth is, Amazon’s FBA shipping process has a lot of moving parts, but it follows a predictable pattern once you know what you’re doing. From enrolling your first product to printing those final pallet labels, each step builds on the last.
This guide walks you through the entire process, so you can ship with confidence and get your products selling faster.
1. Set up FBA.
After creating an Amazon seller account, log in to Seller Central to set up FBA. Review the FBA costs and estimate your potential spending for each product you want to enroll in FBA.
2. Enroll products in FBA.
You can enroll products in FBA from Seller Central in two ways.
One is by selecting “Amazon will ship and provide customer service (FBA)” when you add new inventory. You’ll find this option in the “Offer tab.”
The other is enrolling existing products in FBA. Click or tap “Manage Inventory” when you hover over “Inventory” in the Seller Central main menu. Select “Edit” from the drop-down menu on the right of the product you want to send to FBA. Then, click “Change to Fulfilled by Amazon.”
Whichever option you choose, remember to double-check your products’ dimensions to avoid inventory issues due to inaccurate measurements.
3. Prepare and pack your products.
Amazon requires specific prep for many FBA products to ensure they survive the journey to fulfillment centers and handling by warehouse staff. The good news? You can check prep requirements right in Seller Central during the “Send to Amazon” workflow.
How to check prep requirements: In Step 1 of the Send to Amazon workflow, click on “Packing details” next to your product, then select the prep category to see specific requirements. If your product hasn’t been sent before, you’ll need to choose the most appropriate prep category from the dropdown menu.
Common prep types include:
- Item labeling: Adding Amazon barcodes or labels
- Bagging: Poly bags with suffocation warnings for certain items
- Bubble wrap: For fragile products
- Boxing: Individual boxing for breakable items
- Cap seal: Securing lids on liquid products
- Opaque covering: For adult products or items with explicit content
- Set creation: Bundling related items together
Products that typically need prep:
- Liquids, gels, and creams (cap seals, bagging)
- Small products and jewelry (bagging to prevent loss)
- Fragile items (bubble wrap or boxing)
- Softlines and baby products (bagging with warnings)
- Sharp products (protective covering)
- Batteries (specific labeling requirements)
Amazon’s prep requirements are based on products surviving a 3-foot drop test onto concrete—five consecutive drops from different angles (top, bottom, largest side, corner, and longest edge). Your prep needs to ensure the product stays intact through this level of handling.
Pro tip: If you’re unsure about prep requirements, it’s better to over-prep than under-prep. Amazon charges fees for products that arrive improperly prepared, and they may refuse or return non-compliant shipments at your expense.
You can also consider Amazon’s Ships in Product Packaging (SIPP) program for eligible products, which allows custom packaging that meets Amazon’s standards without additional prep—potentially reducing your fulfillment fees.
4. Ship your products.
In this step, you’ll follow the “Send to Amazon” workflow in Seller Central, which simplifies FBA shipment creation. Carefully review the steps below.
Step 1. Choose your inventory

You can add inventory to your workflow in two ways.
- The first option, “Select from list,” shows all your FBA SKUs and lets you choose quantities manually.
- The second option, “File upload,” lets you bulk-add inventory using an Excel template. This is useful when you’re shipping dozens or hundreds of SKUs.
When adding inventory, you’ll specify how items are packed. Single-SKU boxes, called case packs, contain multiple units of the same product. If you regularly ship the same products in identical box configurations, create reusable case pack templates that store box dimensions, weights, prep requirements, and labeling details. You can create up to three templates per SKU, which saves significant time on repeat shipments since you won’t need to re-enter packaging details.
Individual units are for mixed-SKU boxes or when your packaging varies between shipments. This option requires more work later since you’ll need to specify exactly which products go in each box. Single-SKU pallets are for larger quantities where you’re placing boxes of the same product onto pallets, or putting individual items directly onto pallets (like tires or furniture).
For each product, you’ll also specify prep requirements, who handles the prep (you or Amazon), and who applies labels (you or Amazon). Amazon’s prep and labeling services cost extra but can save time if you’re handling large volumes. The system automatically checks your products against Amazon’s prep requirements and flags any issues.
Step 1b: Pack individual units (Skip if you’re shipping case packs)
If you chose individual units in Step 1, this additional step appears. Amazon groups your products into “pack groups” based on compatibility—products with similar size, weight, prep requirements, and hazmat status can be packed together. You can’t mix items from different pack groups in the same box, which prevents compatibility issues at the fulfillment center.
For each pack group, you’ll specify how many boxes you need and what goes in each box. If everything fits in one box, you simply enter the total box weight and dimensions. For multiple boxes, you have several options:
- Use the web form for smaller shipments (under 12 units)
- Upload an Excel file for larger ones
- Use the Scan and Pack feature to scan barcodes as you pack
- Pay Amazon to manually process your boxes at $0.15 per unit
The Scan and Pack option is particularly useful if you’re packing in real-time. You can scan product barcodes directly into the system, which automatically populates quantities and helps prevent packing errors. This feature includes a pick list function that helps warehouse staff organize inventory for packing.
Amazon validates your box weights and dimensions against the products inside. The system expects the box weight and volume to be no more than 10% less than the combined weight and volume of contents. If your numbers seem off, you’ll get a warning, though you can proceed if you’re confident your measurements are accurate.
Step 2. Confirm shipping details
This is where you choose how your inventory gets to Amazon. Your main decision is between small parcel delivery (individual boxes via UPS, FedEx, etc.) and less than truckload or LTL (palletized shipments via freight carriers). You can also use multi-mode shipping to combine both methods in the same workflow, though this requires careful planning since different shipping modes have different requirements.
Amazon might route your inventory to multiple fulfillment centers based on where you’re shipping from and what products you’re sending. This inventory placement optimization reduces customer delivery times, but it means you might need to send different products to different locations. If you prefer sending everything to one location, you can sign up for Amazon’s Inbound Placement Service, though this costs extra.
When selecting carriers, Amazon partnered carriers offer significant advantages: discounted shipping rates, automatic tracking updates, and integrated label printing. The system calculates shipping costs in real-time so you can compare options. Non-partnered carriers give you more control but require more manual work, like creating your own shipping labels and providing tracking information.
You’ll also set your ship date, which helps Amazon plan for your inventory’s arrival. This date should reflect when you’ll actually hand off your shipment to the carrier. If you’re using a non-partnered carrier, you’ll need to provide a delivery window—a seven-day range for domestic shipments or 14 days for international shipments.
Step 3. Print box labels
Every single box in your shipment needs an FBA box ID label, which Amazon uses to identify and track your inventory throughout their system. These labels are unique to each shipment and must match exactly with your box contents. Applying the wrong label to the wrong box can cause significant delays and processing problems.
For small parcel shipments using Amazon partnered carriers, you’ll get both FBA box ID labels and shipping labels in one PDF file. Print these labels and apply them carefully—one FBA label and one shipping label per box. The shipping labels are already paid for and include tracking information that automatically updates in your seller account.
If you’re using your own carrier for small parcel shipments, you’ll only get FBA box ID labels from Amazon. You’ll need to work with your carrier separately to create shipping labels, then apply both the FBA label and your carrier’s label to each box. After handing off your shipment, you must provide tracking numbers in the workflow to keep Amazon informed of your shipment’s progress.
Pallet shipments also need FBA box ID labels on every box, but these go on the outside of boxes before they’re wrapped on pallets. This ensures warehouse staff can see and scan the labels when they unpack your pallets. The labels must be clearly visible and not covered by stretch wrap or other packaging materials.
Step 4. Confirm pallet information (LTL shipments only)
This step only appears if you’re sending pallet shipments. You’ll choose between Amazon partnered carriers and your own freight company. Amazon’s freight partners offer competitive rates and handle much of the logistics automatically, while using your own carrier gives you more control but requires more manual coordination.
For Amazon partnered carriers, you’ll provide warehouse contact information so the carrier can coordinate pickup. Amazon generates initial estimates for your pallet configuration based on the box information you provided earlier, but you should verify these numbers carefully. Inaccurate pallet information can result in unexpected charges or delivery problems.
The system shows freight class ratings, which freight carriers use to determine pricing. These classes run from 50 to 500, with lower numbers indicating denser, easier-to-handle freight that costs less to ship. You can manually adjust freight class if you disagree with Amazon’s estimate, but be accurate since incorrect classifications can result in additional charges from the carrier.
You’ll select your freight-ready date from available calendar options. Grayed-out dates indicate limited carrier capacity, so plan accordingly. Amazon shows estimated shipping costs for different carriers and dates, helping you balance cost against timing needs. Remember that freight shipments typically require more lead time than small parcel deliveries.
Step 5. Print pallet labels (Amazon partnered LTL only)
If you’re using an Amazon partnered carrier for your pallet shipment, this step generates the specialized labels your pallets need. Each pallet gets four identical labels—one for each side—positioned near the top and clearly visible to forklift operators. These labels contain routing information, pallet contents, and tracking details that fulfillment centers use to process your shipment.
The labels must be applied on the outside of the stretch wrap so they remain scannable throughout the shipping process. Position them squarely on each side of the pallet, not at angles that might make scanning difficult. If your pallet contains only one ASIN, mark it as a “Single ASIN pallet” to help with warehouse processing.
Amazon also generates a bill of lading (BOL) on the morning of your pickup date. This legal document serves as both a receipt and a contract with the carrier, detailing exactly what’s being shipped. You must provide this BOL to the carrier, or they may refuse the shipment. The BOL includes your Amazon Reference Number (ARN), which the carrier needs to schedule delivery appointments at fulfillment centers.
For shipments using Amazon Freight LTL, you’ll need additional carrier-specific pallet labels beyond the standard FBA labels. Each set of four carrier labels is unique and must be applied alongside your FBA pallet labels. This dual-labeling system ensures proper routing through both Amazon’s network and the carrier’s system.
Step 6. Tracking details (non-partnered carriers only)
This final step only appears if you’re using your own carriers instead of Amazon’s partnered options. You’ll need to provide tracking information that helps Amazon prepare for your shipment’s arrival and speed up the receiving process at fulfillment centers.
For small parcel shipments, enter the tracking number for each individual box. You can type these manually, scan them with a barcode reader, or upload them in bulk using a template. The system maps each tracking number to the corresponding FBA box ID, so accuracy is crucial. Incorrect tracking information can delay processing by up to 30%.
Pallet shipments require either a PRO (Progressive) number or a BOL (Bill of Lading) number. The PRO number is a unique identifier your freight carrier assigns for tracking purposes—you’ll find this on shipping documents they provide. The BOL number appears on the Bill of Lading document that your carrier issues at pickup. Either number works, but you must provide one to update your shipment status to “Shipped.”
You can also update delivery windows in this step if your shipping timeline changes. However, once your delivery window starts, it becomes locked to help Amazon plan receiving operations. If you need to make changes after this point, you’ll need to work directly with Amazon’s support team, which can cause delays.
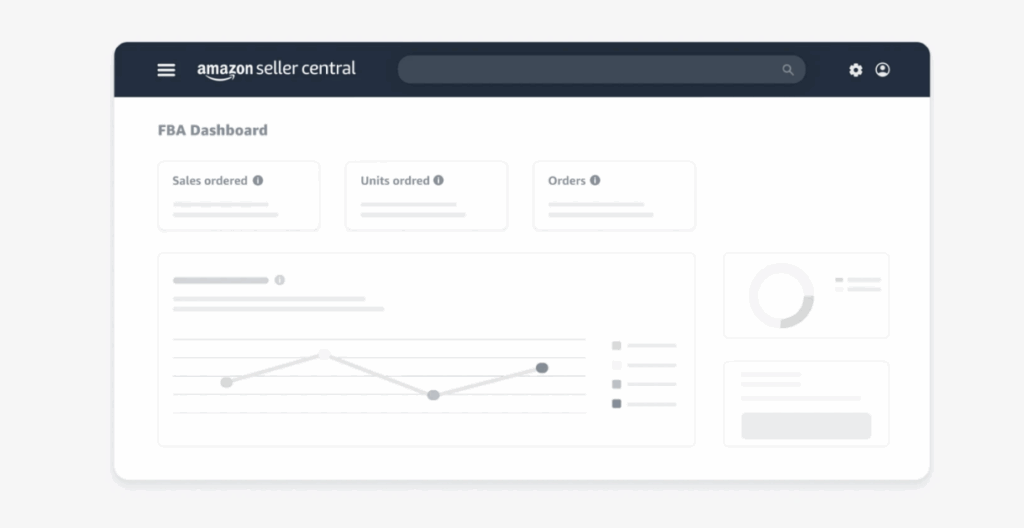
5. Track your inventory.
Now that you have finished the workflow, you can track your inventory and manage stock levels from your FBA dashboard. You can find this dashboard by going to the Seller Central main menu, hovering over “Inventory,” and clicking “Dashboard” under Fulfillment by Amazon.
You can monitor shipments or create new ones using the “Shipments” tab. To track, plan, and restock inventory, click the “Inventory” tab.
You can also use the FBA Restock Inventory tool to eliminate guesswork from your inventory operations. This tool helps you plan shipment quantities and timeframes, makes custom recommendations based on sales history, predicts demand and seasonality, and provides replenishment settings.
Streamline your FBA operations with the right tools
Shipping to FBA might seem overwhelming at first, but like learning to ride a bike, it gets easier once you’ve done it a few times. The key is getting those details right the first time—accurate measurements, proper labeling, and careful attention to Amazon’s requirements can save you from costly headaches down the road.
Remember, FBA handles the heavy lifting of storage, packing, and customer service once your products arrive. That frees you up to focus on what really matters: finding profitable products, optimizing your listings, and growing your business.
The shipping process is just one piece of the Amazon puzzle. Between prep requirements, inventory management, and tracking shipments across multiple fulfillment centers, running an FBA business involves juggling many moving parts. This is where tools like InventoryLab can transform your workflow from chaotic to streamlined.

InventoryLab simplifies the entire FBA shipping process with automated workflows that handle everything from box planning to label printing. You can create shipments faster, reduce errors with built-in validation, and track your inventory seamlessly.
The platform supports both small parcel delivery (SPD) and less-than-truckload (LTL) shipments (in beta), with features like reusable case pack templates, automated pallet configurations, and integrated packing lists that eliminate the guesswork from shipping.
Want to see how it works? Check out InventoryLab’s detailed guides for completing SPD shipments and completing LTL shipments to get a feel for how much easier FBA shipping can be.
The best part? InventoryLab is just one of 10 apps you get with Seller 365. Get streamlined shipping workflows plus sourcing tools, repricing automation, review management, and profit tracking—everything you need to run your Amazon business in one subscription. Try it free today for up to 14 days.